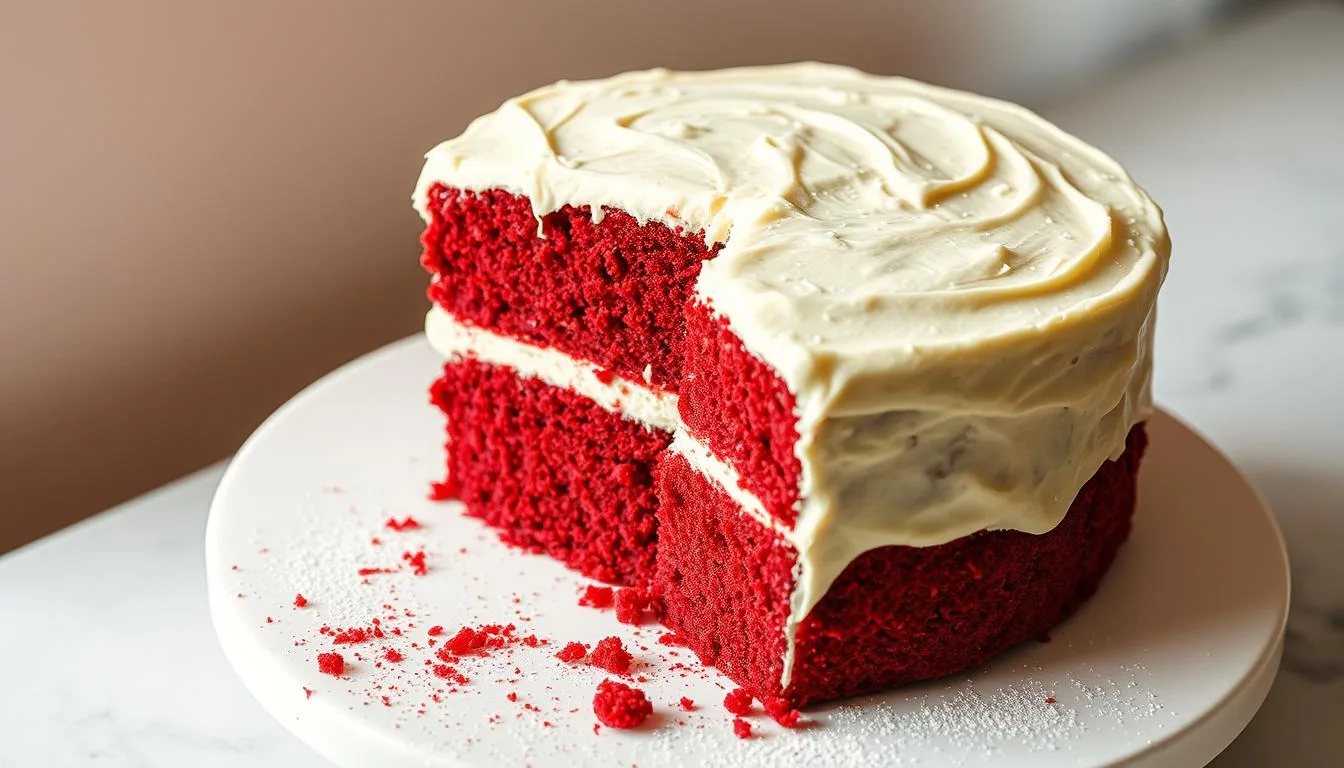
Classic Red Velvet Cake Recipe – Easy Homemade Dessert
Table of Contents
Growing up in Georgia, red velvet cake was a family tradition. Every Sunday, my grandmother would make the most decadent red velvet cake. It brought our family together.
The red velvet cake recipe is a Southern gem. It’s more than a sweet treat. It connects generations with its rich flavors and nostalgic memories. This recipe is perfect for both beginners and experienced cooks.
You’ll learn the secrets to making the perfect red velvet cake. From choosing the best ingredients to mastering cream cheese frosting. Get ready to make your kitchen a Southern bakery and create a dessert that will become a family tradition.
Introduction to Red Velvet Cake
Red velvet cake is a beloved treat in southern cuisine. It charms dessert fans with its unique taste and rich history. This cake is more than a sweet delight; it’s a story of tradition, innovation, and pride.
Origin of Red Velvet Cake
The cake’s history goes back to the Victorian era. It was a fancy dessert with a hint of chocolate. Its red color came from cocoa powder and buttermilk, making it stand out from other chocolate cakes.
Popularity in American Cuisine
In the Great Depression, the cake became a hit in the south. Restaurants and bakeries made it their go-to dessert. It went from a local favorite to a national favorite.
Key Characteristics of the Cake
- Subtle chocolate flavors from cocoa powder
- Vibrant red color
- Velvety, smooth texture
- Cream cheese frosting complement
Knowing the history of red velvet cake makes it more special. Each slice is a tale of creativity and southern warmth.
Ingredients for Your Red Velvet Cake
Making a perfect red velvet cake needs the right ingredients. Each one adds to the cake’s taste and texture. Knowing what goes into it will help you make a dessert that wows everyone.
Essential Ingredients for Classic Red Velvet Cake
The key to a great red velvet cake is a few important ingredients:
- All-purpose flour for structure
- Cocoa powder for rich chocolate undertones
- Buttermilk for tender crumb and tangy flavor
- White vinegar to activate baking soda
- Red food coloring for iconic deep red color
Optional Ingredients for Creative Variations
Try these optional ingredients to make your red velvet cake unique:
- Almond extract for nutty undertones
- Dark chocolate chips for extra decadence
- Espresso powder to enhance chocolate flavor
- Cream cheese for richer frosting
Recommended Brands for Baking Success
Choosing high-quality ingredients can make your red velvet cake stand out. Here are some top brands:
| Ingredient | Recommended Brand | Why We Love It |
|---|---|---|
| Cocoa Powder | Ghirardelli | Rich, smooth chocolate flavor |
| Buttermilk | Organic Valley | Creamy texture, consistent quality |
| Food Coloring | McCormick | Vibrant red color, no bitter aftertaste |
| Vinegar | Bragg Organic | Pure, high-quality apple cider vinegar |
By picking and measuring your ingredients carefully, you’ll make a stunning red velvet cake. It will look as good as it tastes.
Preparing the Cake Batter
Making the perfect red velvet cake starts with the batter. It’s all about the right mix of ingredients and techniques. These steps turn simple parts into a tasty treat.
For red velvet cake batter, you need precision and patience. The right mix can turn a dry cake into a moist, tender one.
Essential Mixing Techniques
- Use room temperature ingredients for smoother blending
- Sift dry ingredients to prevent lumps
- Mix wet and dry ingredients gradually
- Avoid overmixing to maintain cake’s delicate texture
Achieving the Perfect Batter Consistency
The perfect batter should be smooth and silky. It should flow well but not be too thin. Here’s how to get it just right:
| Consistency Indicator | What to Look For | Action Required |
|---|---|---|
| Too Thick | Batter seems stiff | Add milk gradually |
| Too Thin | Batter runs quickly | Add small amounts of flour |
| Perfect Consistency | Ribbons form when lifted | Ready to bake! |
Experts say to mix on medium speed with an electric mixer. Stop mixing once everything is just combined. This avoids a tough, dense cake.
Baking the Red Velvet Cake
Making decadent desserts like red velvet cake needs precision and care. The baking process is key to getting a moist, tender cake. It will impress your guests and satisfy your sweet tooth.
Professional baking tips can make your homemade cake stand out. Knowing about oven temperature and baking time is crucial. It helps you make the perfect red velvet cake every time.
Oven Temperature Secrets
For the best results, preheat your oven to 350°F (175°C). This temperature ensures even baking and keeps the cake’s delicate texture. Follow these key baking tips for optimal results:
- Use an oven thermometer to verify actual temperature
- Place cake pans in the center of the oven
- Avoid opening the oven door during the first 20 minutes of baking
Testing for Perfect Doneness
Figuring out when your desserts are ready is simple:
- Insert a toothpick into the cake’s center
- If it comes out clean or with minimal crumbs, the cake is done
- Gently press the cake’s center – it should spring back
Cooling Techniques
Proper cooling is key to keeping your cake’s texture and preventing issues. Remove the cake from the pan after 10-15 minutes of cooling. Then, transfer it to a wire rack to cool completely before frosting.
Being patient during cooling ensures your red velvet cake stays moist. It also keeps its shape, making it a spectacular dessert.
Making the Cream Cheese Frosting
Cream cheese frosting turns a simple red velvet cake into a showstopper. It adds a rich, tangy flavor that matches the cake’s chocolate hints.
Making the frosting right needs careful attention and top-notch ingredients. You want it smooth, sweet, and tangy.
Essential Ingredients for Cream Cheese Frosting
- 8 oz cream cheese (full-fat, room temperature)
- 1/2 cup unsalted butter (softened)
- 4 cups powdered sugar
- 1 teaspoon vanilla extract
- Pinch of salt
Step-by-Step Frosting Instructions
- Make sure all ingredients are at room temperature
- Beat cream cheese and butter until smooth
- Slowly add powdered sugar
- Mix in vanilla extract and salt
- Beat until it’s light and fluffy
For the best results, chill the frosting for 15 minutes before using. This makes it smooth and perfect for spreading.
| Texture Goal | Mixing Technique | Time Required |
|---|---|---|
| Smooth | Low-medium speed | 3-4 minutes |
| Fluffy | Medium-high speed | 2-3 minutes |
Remember, patience is key when making cream cheese frosting. Take your time and enjoy the process of creating this delightful topping!
Assembling the Cake

Making the perfect red velvet cake needs careful assembly and detail. Your cake will stand out when you layer and frost it right. The secret to a stunning dessert is in the precise techniques that turn simple ingredients into a masterpiece.
- Cake turntable
- Offset spatula
- Bench scraper
- Serrated knife
Layering Techniques for Stability
Here are professional tips for stable and beautiful cake layers:
- Let cake layers cool completely before assembling
- Use a serrated knife to level each cake layer
- Place first layer on a cake board or serving plate
- Apply a thin crumb coat of cream cheese frosting between layers
Cream Cheese Frosting Application Tips
Getting a smooth cream cheese frosting finish takes patience and skill. Start with a thin layer of frosting to seal crumbs. Chill the cake for 15-20 minutes between frosting layers for a professional finish.
| Frosting Technique | Key Tip |
|---|---|
| Crumb Coat | Thin layer to seal cake crumbs |
| Final Coat | Smooth, even application |
| Chilling | 15-20 minutes between layers |
Your red velvet cake is now ready to wow. The careful layering and cream cheese frosting will make a dessert that looks as amazing as it tastes.
Decorating Ideas for Red Velvet Cake
Turning your red velvet cake into a stunning dessert needs creativity and a touch of southern flair. Whether it’s for a special event or to improve your baking, these ideas will help you create a masterpiece.
Classic Decoration Styles
Traditional red velvet cake decorations are simple yet elegant. The most iconic way is:
- Cream cheese frosting spread evenly across all layers
- Gentle coating of cake crumbs around the exterior
- Delicate piped borders using classic white frosting
Creative Themes and Additions
Make your desserts stand out with unique decoration techniques that show your style:
- Valentine’s Day Heart Design
- Red fondant hearts
- Chocolate drizzle
- Edible glitter accents
- Rustic Southern Charm
- Buttercream rosettes
- Vintage-inspired sugar flowers
- Textured frosting techniques
For a southern touch, add fresh berries or edible gold leaf for a spectacular look.
| Decoration Style | Skill Level | Occasion |
|---|---|---|
| Classic Cream Cheese Frosting | Beginner | Everyday Dessert |
| Fondant Sculpted Design | Advanced | Wedding/Special Event |
| Rustic Naked Cake Style | Intermediate | Casual Gathering |
Storing Your Red Velvet Cake

Keeping your red velvet cake fresh is key. Whether you’re eating it now or saving it for later, these tips will help. They ensure your cake stays delicious and moist.
Short-Term Storage Strategies
After baking your red velvet cake, storing it right is important. Here’s how to keep it tasty and moist:
- Store the cake in an airtight container
- Keep at room temperature for up to 2 days
- Protect from direct sunlight and heat
Long-Term Freezing Instructions
Freezing your cake lets you enjoy it for weeks. Here’s a guide on freezing and thawing:
| Storage Method | Duration | Preparation Tips |
|---|---|---|
| Whole Cake | Up to 3 months | Wrap tightly in plastic wrap and aluminum foil |
| Individual Slices | Up to 2 months | Wrap each slice separately before freezing |
When you’re ready to eat, thaw your cake slowly in the fridge. This keeps its texture and moisture. Remove the wrapping and let it warm up to room temperature. This way, you’ll get the best flavor and texture.
Troubleshooting Common Issues
Baking the perfect red velvet cake can be tough. But knowing common mistakes helps you make a great dessert every time. Start with careful ingredient preparation and precise measurements. Many bakers struggle to get the right texture and rich chocolate flavors.
Temperature control is key when baking your red velvet cake. Ovens can differ a lot, so an oven thermometer is essential. Use a toothpick to check the cake’s center to avoid underbaking. If it gets dry, bake it a bit less and add more buttermilk to keep it moist.
Getting the right color is also important. Use gel food coloring for a vibrant look and mix well to avoid streaks. Choose high-quality cocoa powder for the best chocolate flavors. Make sure your cream cheese is room temperature for a smooth frosting that goes well with the cake.
Practice makes perfect with red velvet cake. Don’t get discouraged by early failures. Each try teaches you something new about technique and ingredients. With patience and attention to detail, you’ll soon be a pro at this classic American dessert that everyone loves.
FAQ
What makes red velvet cake different from other chocolate cakes?
Red velvet cake stands out with its subtle cocoa taste and unique red color. It has a special mix of buttermilk and vinegar. This mix gives it a soft, velvety texture. Unlike regular chocolate cakes, it uses less cocoa and has a finer crumb.
Why do I need to use buttermilk and vinegar in the recipe?
Buttermilk and vinegar are key for a soft cake. They react to make the cake tender and moist. The acid in them breaks down the flour’s gluten, making the cake delicate and tangy.
How much food coloring should I use to get the perfect red color?
You’ll need about 1-2 tablespoons of red food coloring for a deep red. The exact amount depends on the food coloring brand. Always add it slowly and mix well for the right color.
Can I make red velvet cake without food coloring?
Yes, you can! Old recipes used beetroot for the red color. For a natural option, try beetroot powder or concentrate. They give a reddish-brown color without artificial coloring.
How long can I store a red velvet cake?
Store a cream cheese frosted red velvet cake in an airtight container for 3-4 days in the fridge. For longer storage, freeze the cake (unfrosted) for 2-3 months. Wrap it tightly in plastic wrap and foil.
What’s the best way to ensure my cream cheese frosting doesn’t become runny?
Keep your cream cheese and butter cool but not too soft. Use full-fat cream cheese and sift your powdered sugar. Chill the frosting for 15-20 minutes if it’s too soft before applying it.
Can I make red velvet cake gluten-free?
Absolutely! Use a gluten-free flour blend for baking. Make sure it includes xanthan gum or add it separately. This helps keep the cake’s structure and texture.
Why does my red velvet cake sometimes turn out dry?
Dry cakes often come from overbaking or overmixing. Stick to the recipe’s baking time and check the cake early. Mix the batter just until combined to avoid toughening the cake.